- Set up your environment
- Create a policy
- Integrate and deploy an example contract
- Apply the policy to the example contract
- Verify functionality
NOTE: This guide was developed in a MacOS environment, some modification may be necessary to suit a Linux/Windows environment.
1. Set up your environment
Environment dependencies
This guide assumes the following tools are installed and configured correctly. Please see each tool’s installation instructions for more details:Build
Create a copy of our template repository in your own github account by navigating here: https://github.com/forte-service-company-ltd/fre-quickstart and clicking the “Use this template” button on GitHub.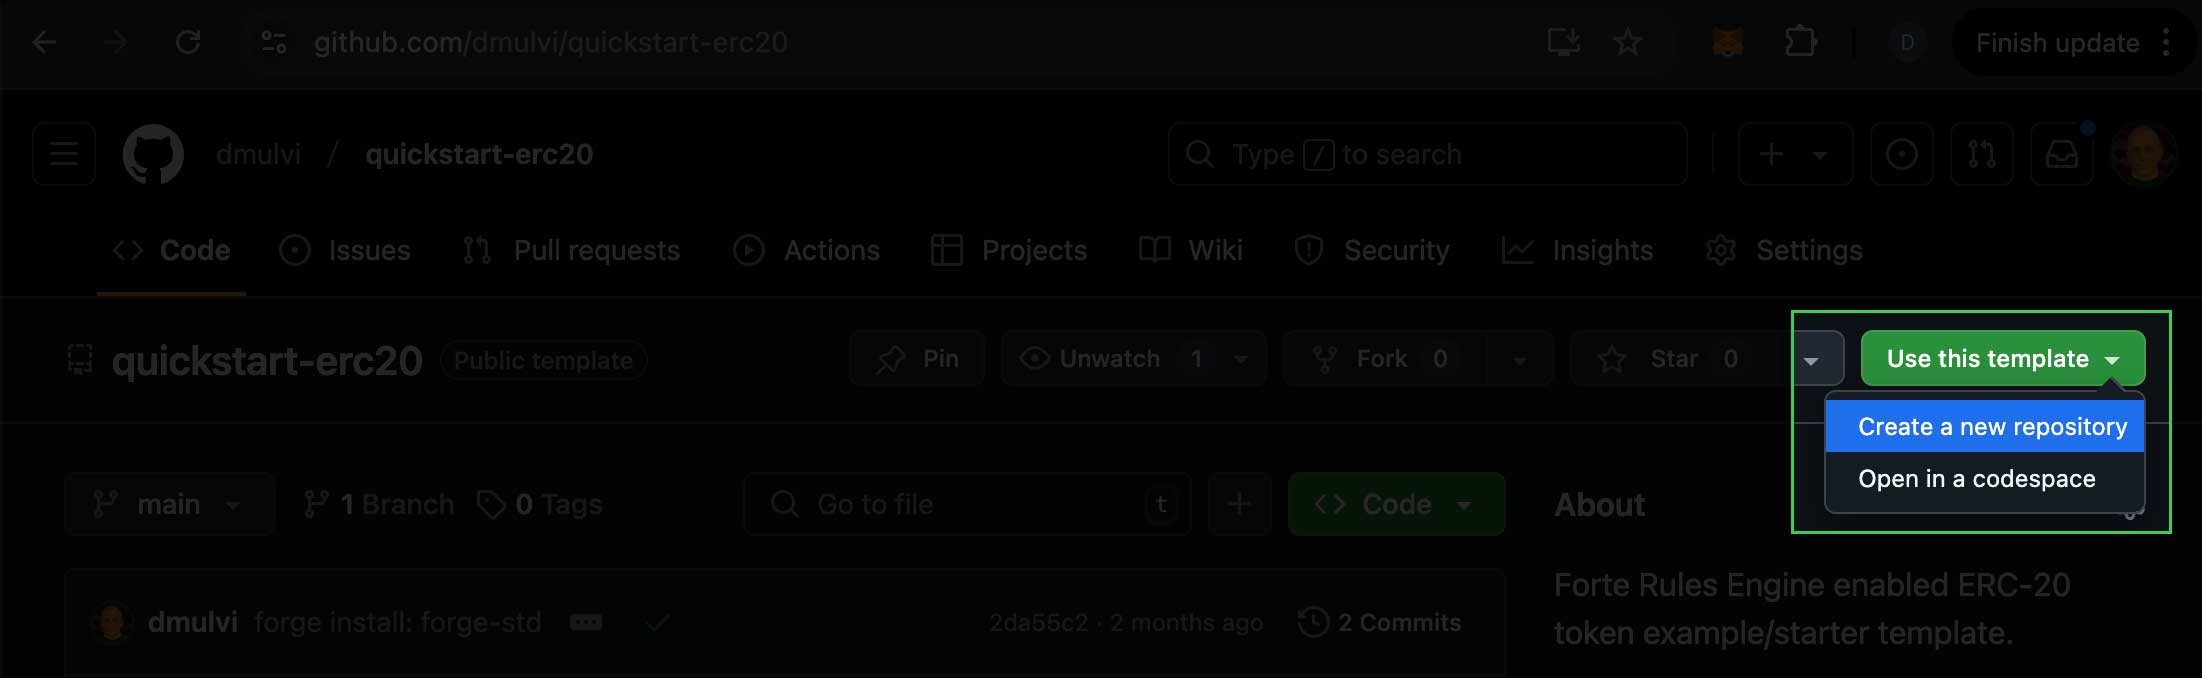
If you named the repository something different than
fre-quickstart, use that name in the clone
command instead.Start a local Anvil chain
An Anvil dumpState file is provided with a pre-deployed Rules Engine instance. Start the local Anvil instance in a terminal window with the following command:Listening on 127.0.0.1:8545 should be the last thing displayed if the state file was successfuly loaded. Leave this Anvil instance running in this terminal for the rest of the quickstart. It may be restarted at any time but restarting will lose any on-chain progress you’ve made during the quickstart.
Configure your local environment
The.env.sample environment file contains the values needed to continue this guide. Expand the Accordion below for more information.
Environment File Details
Environment File Details
RPC_URL - The RPC endpoint to utilize when interacting with an EVM chain. This is defaulted to a local anvil RPC that is enabled when starting anvil. This can be updated to point to any testnet/mainnet RPC if desired. See anvil for more details.PRIV_KEY - The private key for the account that will be performing the actions outlined in this guide. This is defaulted to a widely known default Anvil account for the purposes of this guide. It is recommended that this be updated prior to deploying to any testnet or mainnet.RULES_ENGINE_ADDRESS - The address of the deployed Rules Engine instance on the target RPC’s chain. This is defaulted to the address where the Rules Engine was deployed in the anvilState.json file. For additional chain locations, please see the Forte Rules Engine docs.
2. Create a sample policy
To use the Rules engine, we must first create a policy. A default policy has been written for you within the policy.json that is tailored to work with the ExampleContract. To create this policy in the Rules Engine, run the following command:3. Integrate and deploy an example contract
The ExampleContract is a blank contract that conforms to a standard ERC20 interface transfer() function. The file does not store any data. The integration of the Rules Engine occurs by adding a modifier. This modifier may be generated by passing the policy information, destination modifier filename, and the example contract to the SDK. The SDK will process the policy, generate modifiers within the specified modifier file for each function within the Policy, and inject these newly generated modifiers into the supplied contract. This has been scripted in the index.ts with the following command:src/RulesEngineIntegration.sol file will be created for you. The /src/ExampleContract.sol will be edited to import this new contract, extend it, and add the before<functionName>() modifier to the function specified within the policy.json file.
The src/RulesEngineIntegration.sol will contain a function named setCallingContractAdmin that requires some adjustments – this is intentional. For the purpose of the quickstart you can either remove this function completely or update it to ensure only the deployer can call the function. You will not be able to compile or deploy the ExampleContract.sol until you do this.
fix setCallingContractAdmin
fix setCallingContractAdmin
As mentioned above, you can simply remove the function or add the
override keyword and ensure it calls the parent function. Alternatively, see the other tab below for one way to ensure only the deployer can call this function.setCallingContractAdmin implementation you’re ready to deploy the example contract: